
Building boost?
The Devil is in the details. You have heard that said a million times, but how easy is it to get the details right? What are details that can easily be over looked? What are details that people commonly get wrong?
The discussion about details can easily go down a rabbit-hole leading to the bolt head markings on your oil pan bolts. But let’s tone it down a bit… What are the main details in an engine compartment that make a big impact? The hood opens up and sure, first things that get noticed are the air cleaner, the valve covers, the engine. A few moments pass and your eyes wander around and start looking deeper. Now you are noticing the exhaust, the battery, ignition wires, and so on.
I have always had the belief that if you make one component of a car look great, any of the adjacent parts next to it that are just “okay” all this sudden start to look pretty crappy next to it in contrast if I put it honestly. And a few things I see over and over again at car shows that don’t live up to the quality of a fresh engine… Brake boosters. Wiper motors. Horns. The top of the radiator. So often are these parts things that just get “spray painted black” and moved on from.
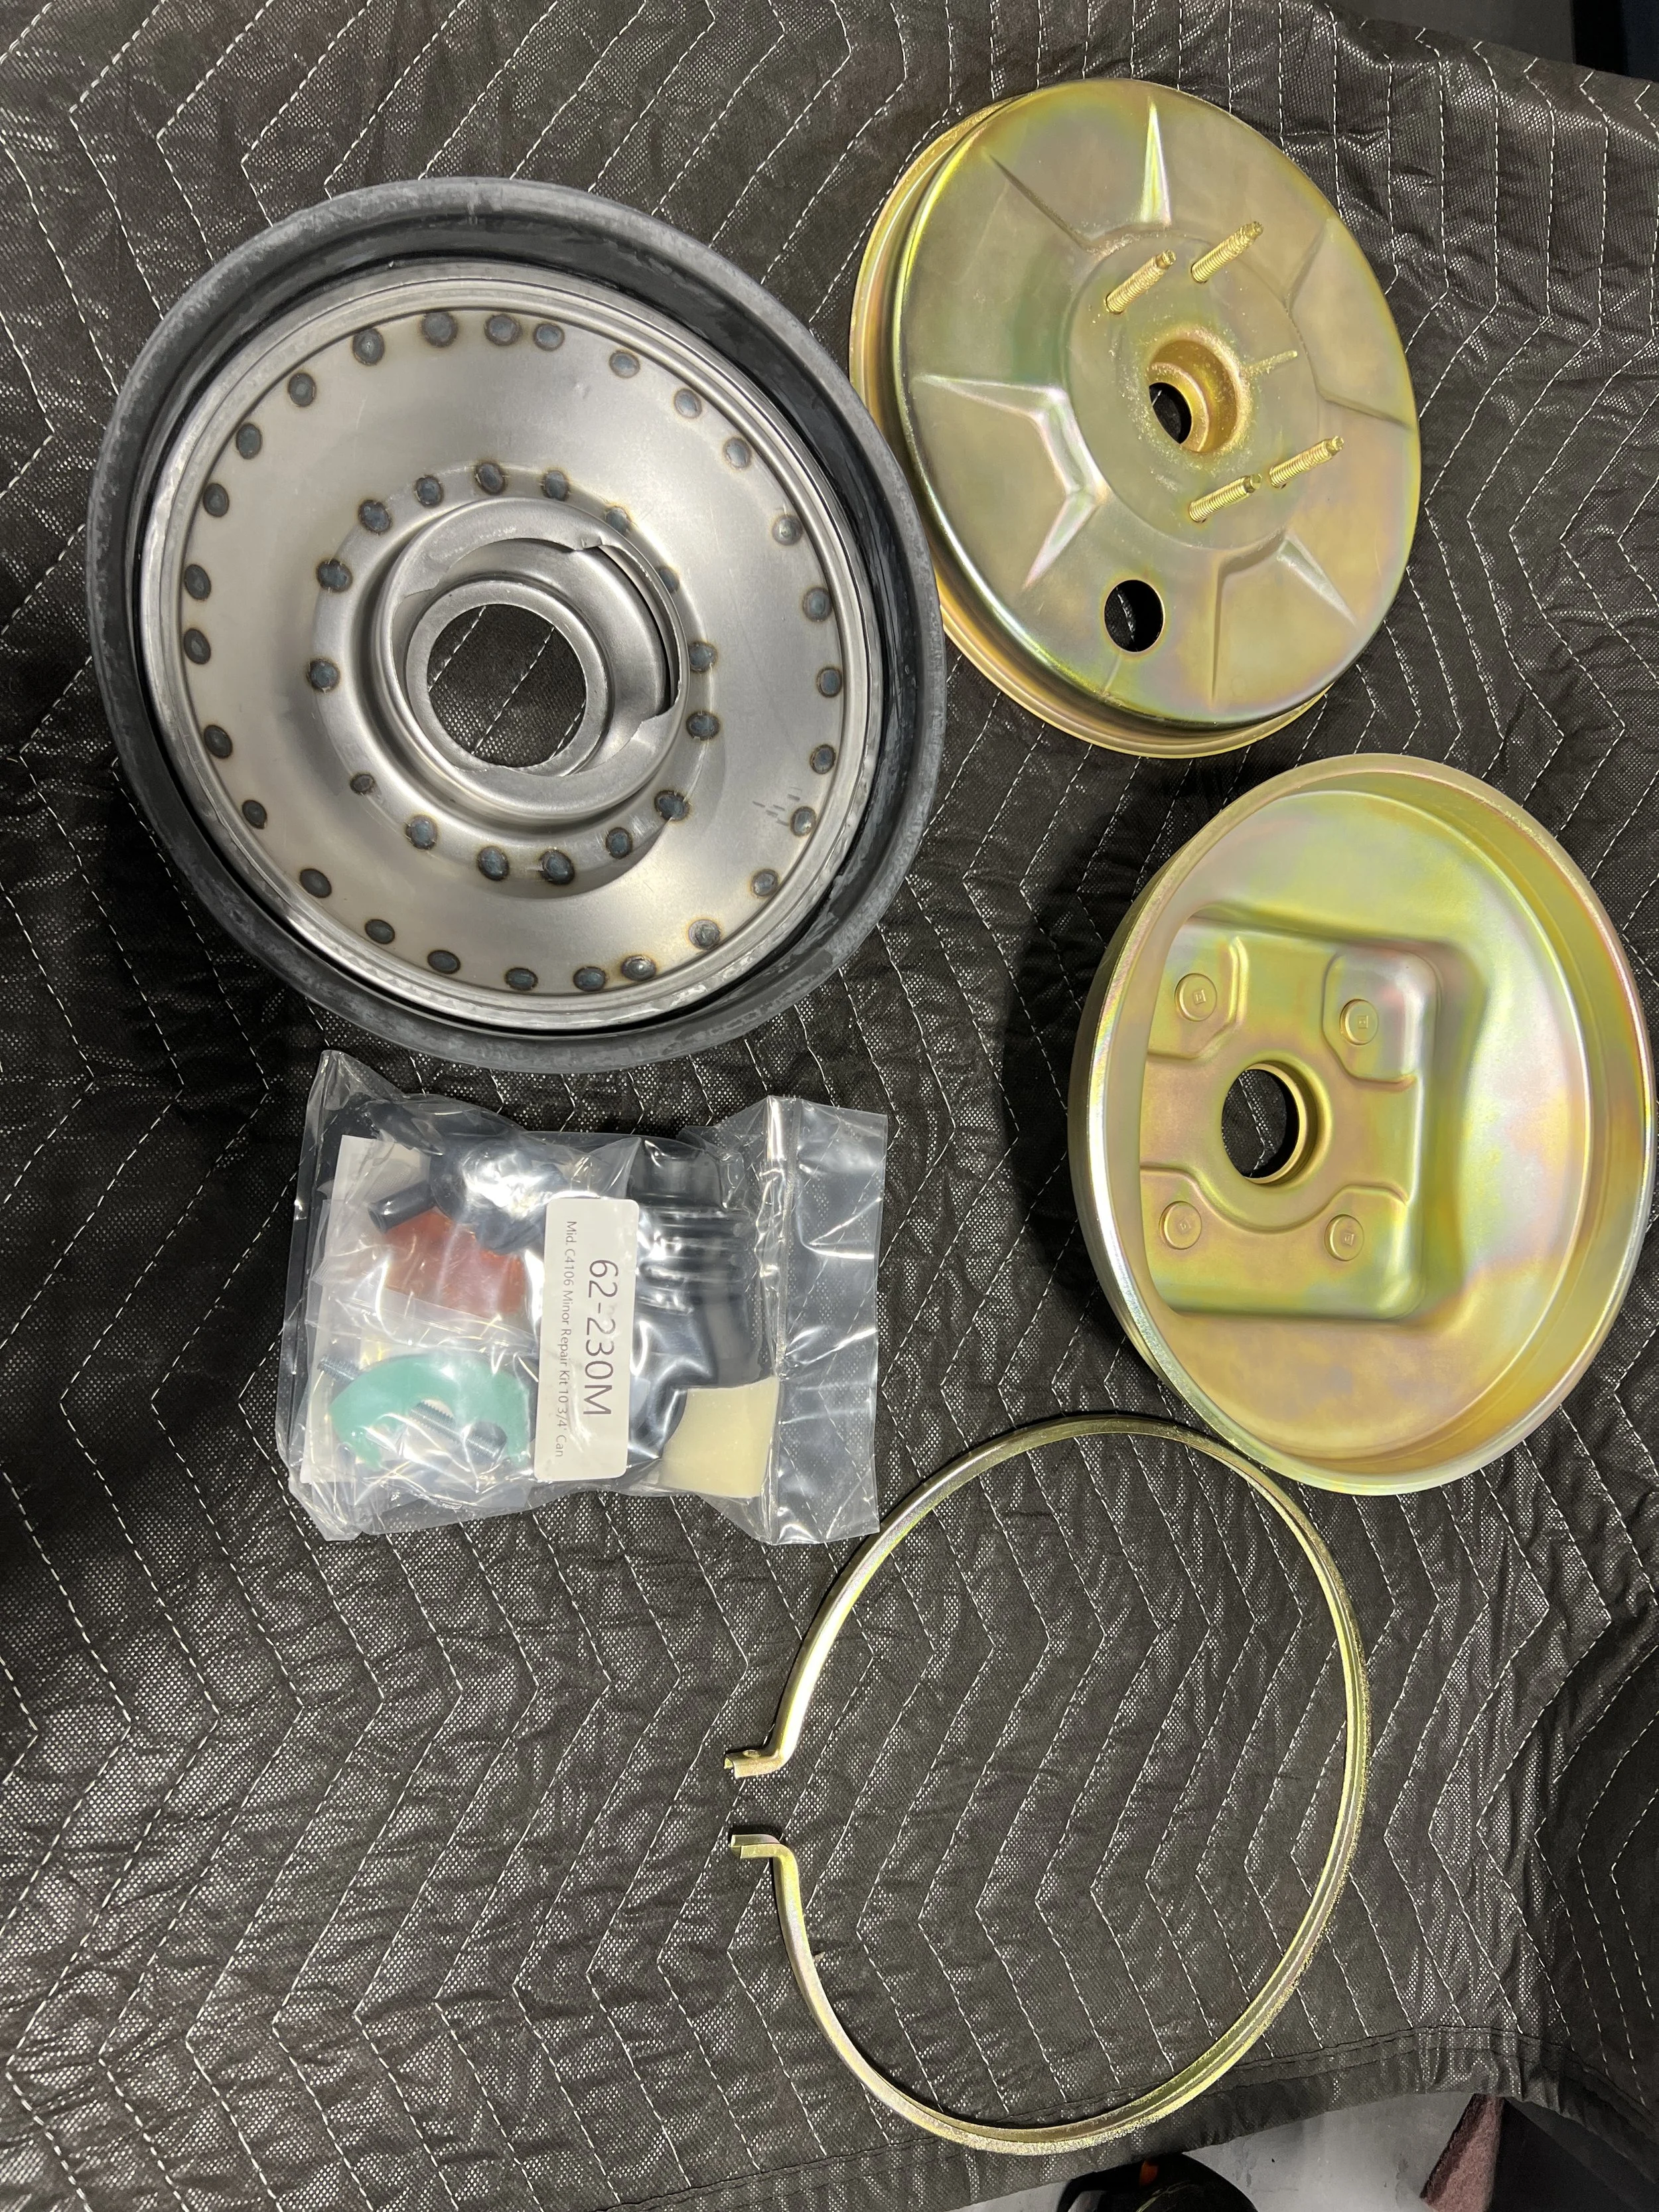
The focus of this blog post today is on a brake booster. The reason this is its own post is simple. It’s a component that I would otherwise just replace with a new one -if it were available. In this case, it’s not. So it needs to be rebuilt. Again, we could just rebuild, paint it black and move on about our day. But what would it take to get it “RIGHT.” Enter our donor part. A 10.5” Midland single diaphragm clamp style booster.
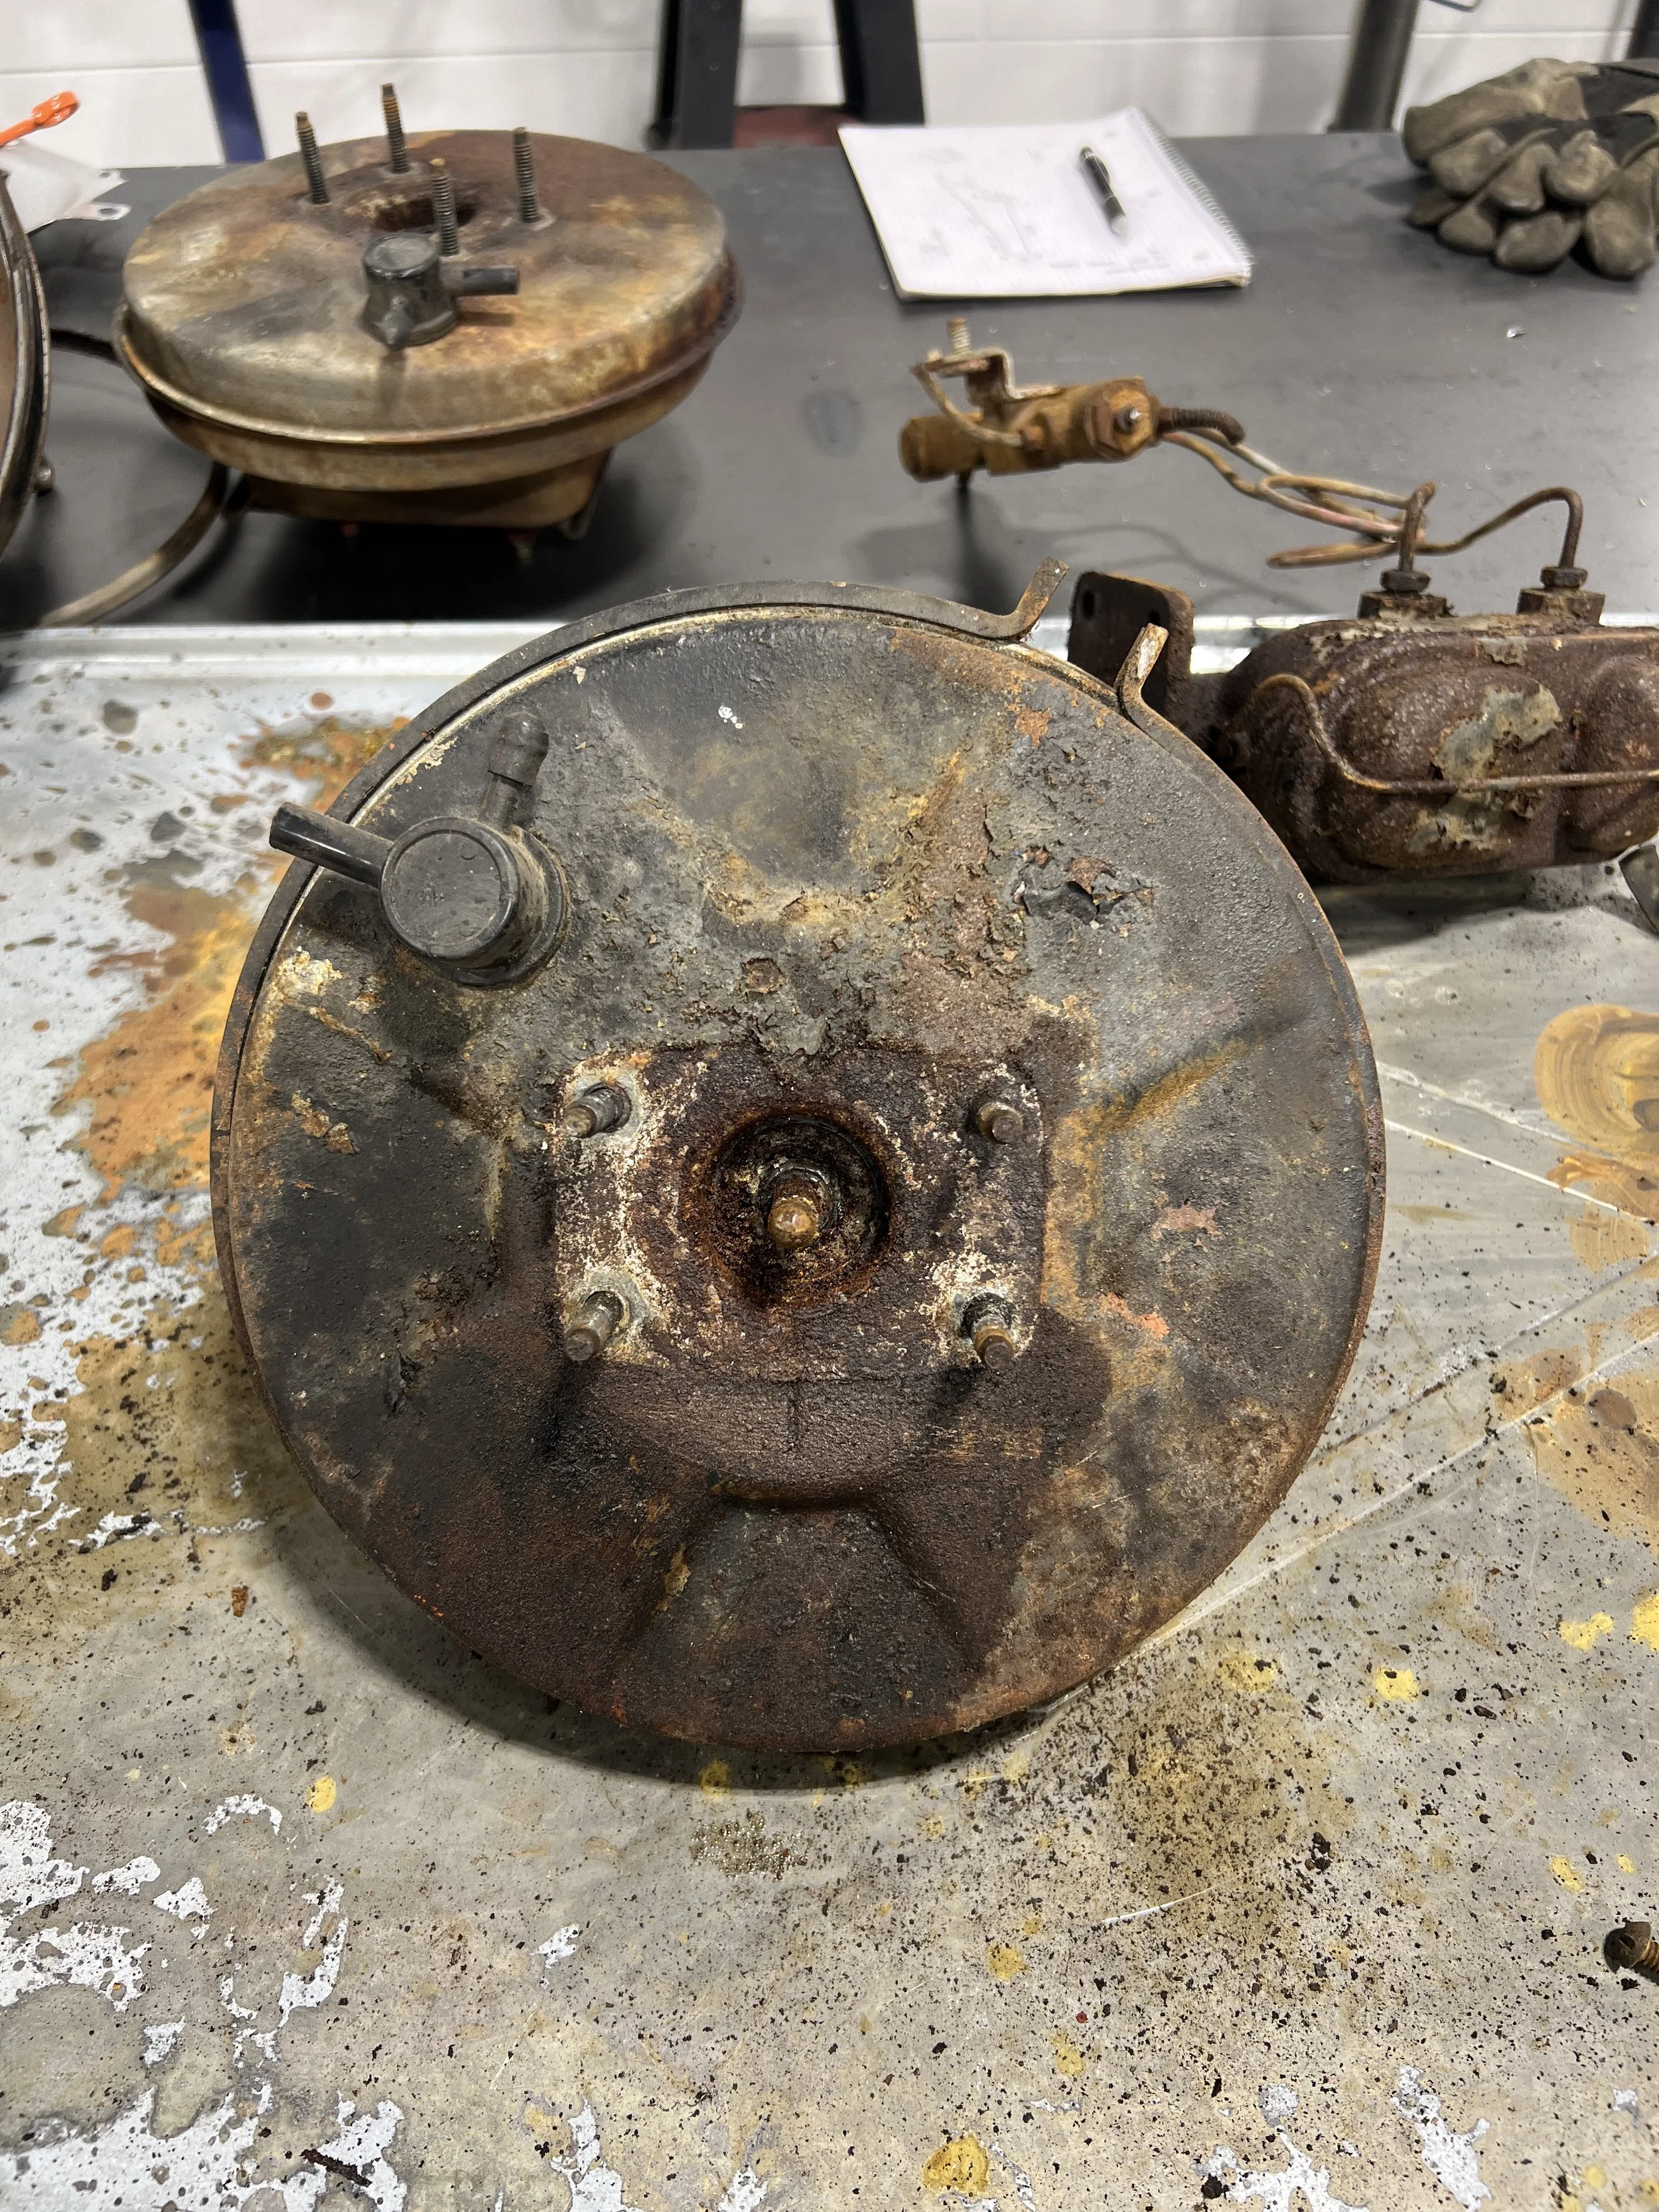
Now it goes without saying why this needed to be rebuilt and restored. Believe it or not, this was a second donor the customer had supplied as the rust pitting on the one off of the car itself was too rough to consider restoring. We knew we wanted to go back to the original yellow zinc the booster was supposed to be, so a decent core was needed.
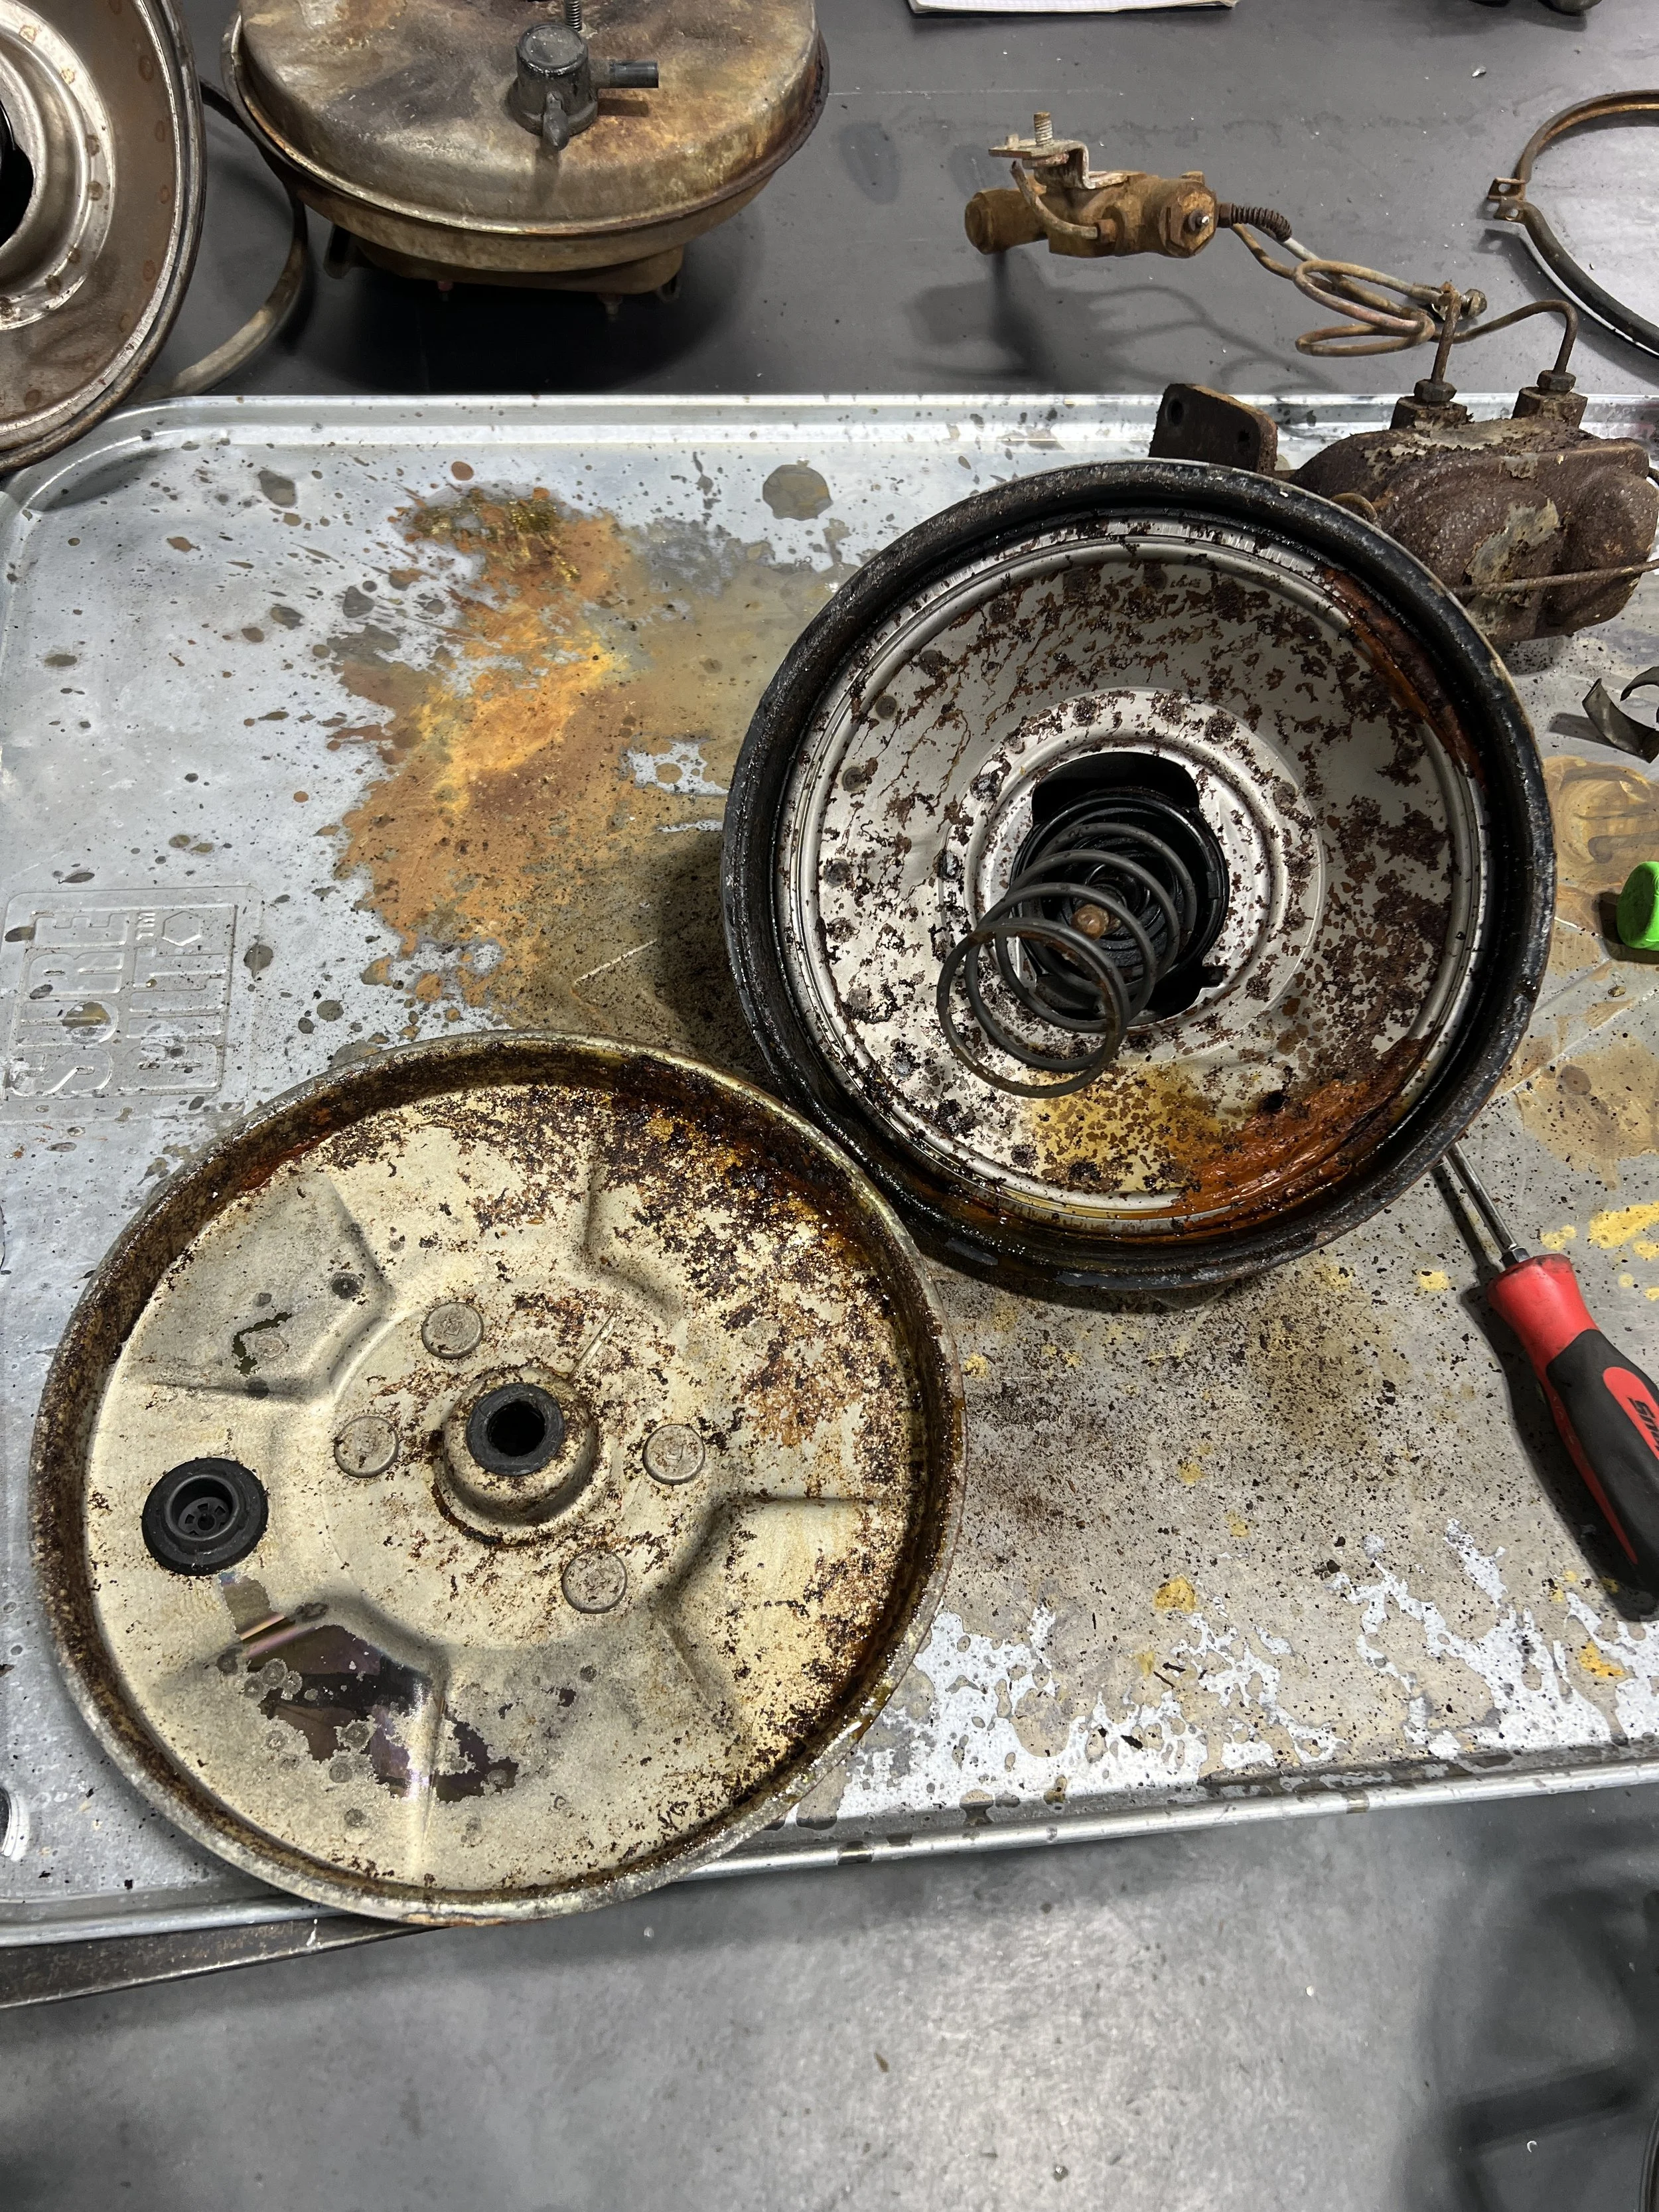
No surprises inside as it comes apart. Everything inside was junk. A full rebuild kit was ordered from Classic Industries.
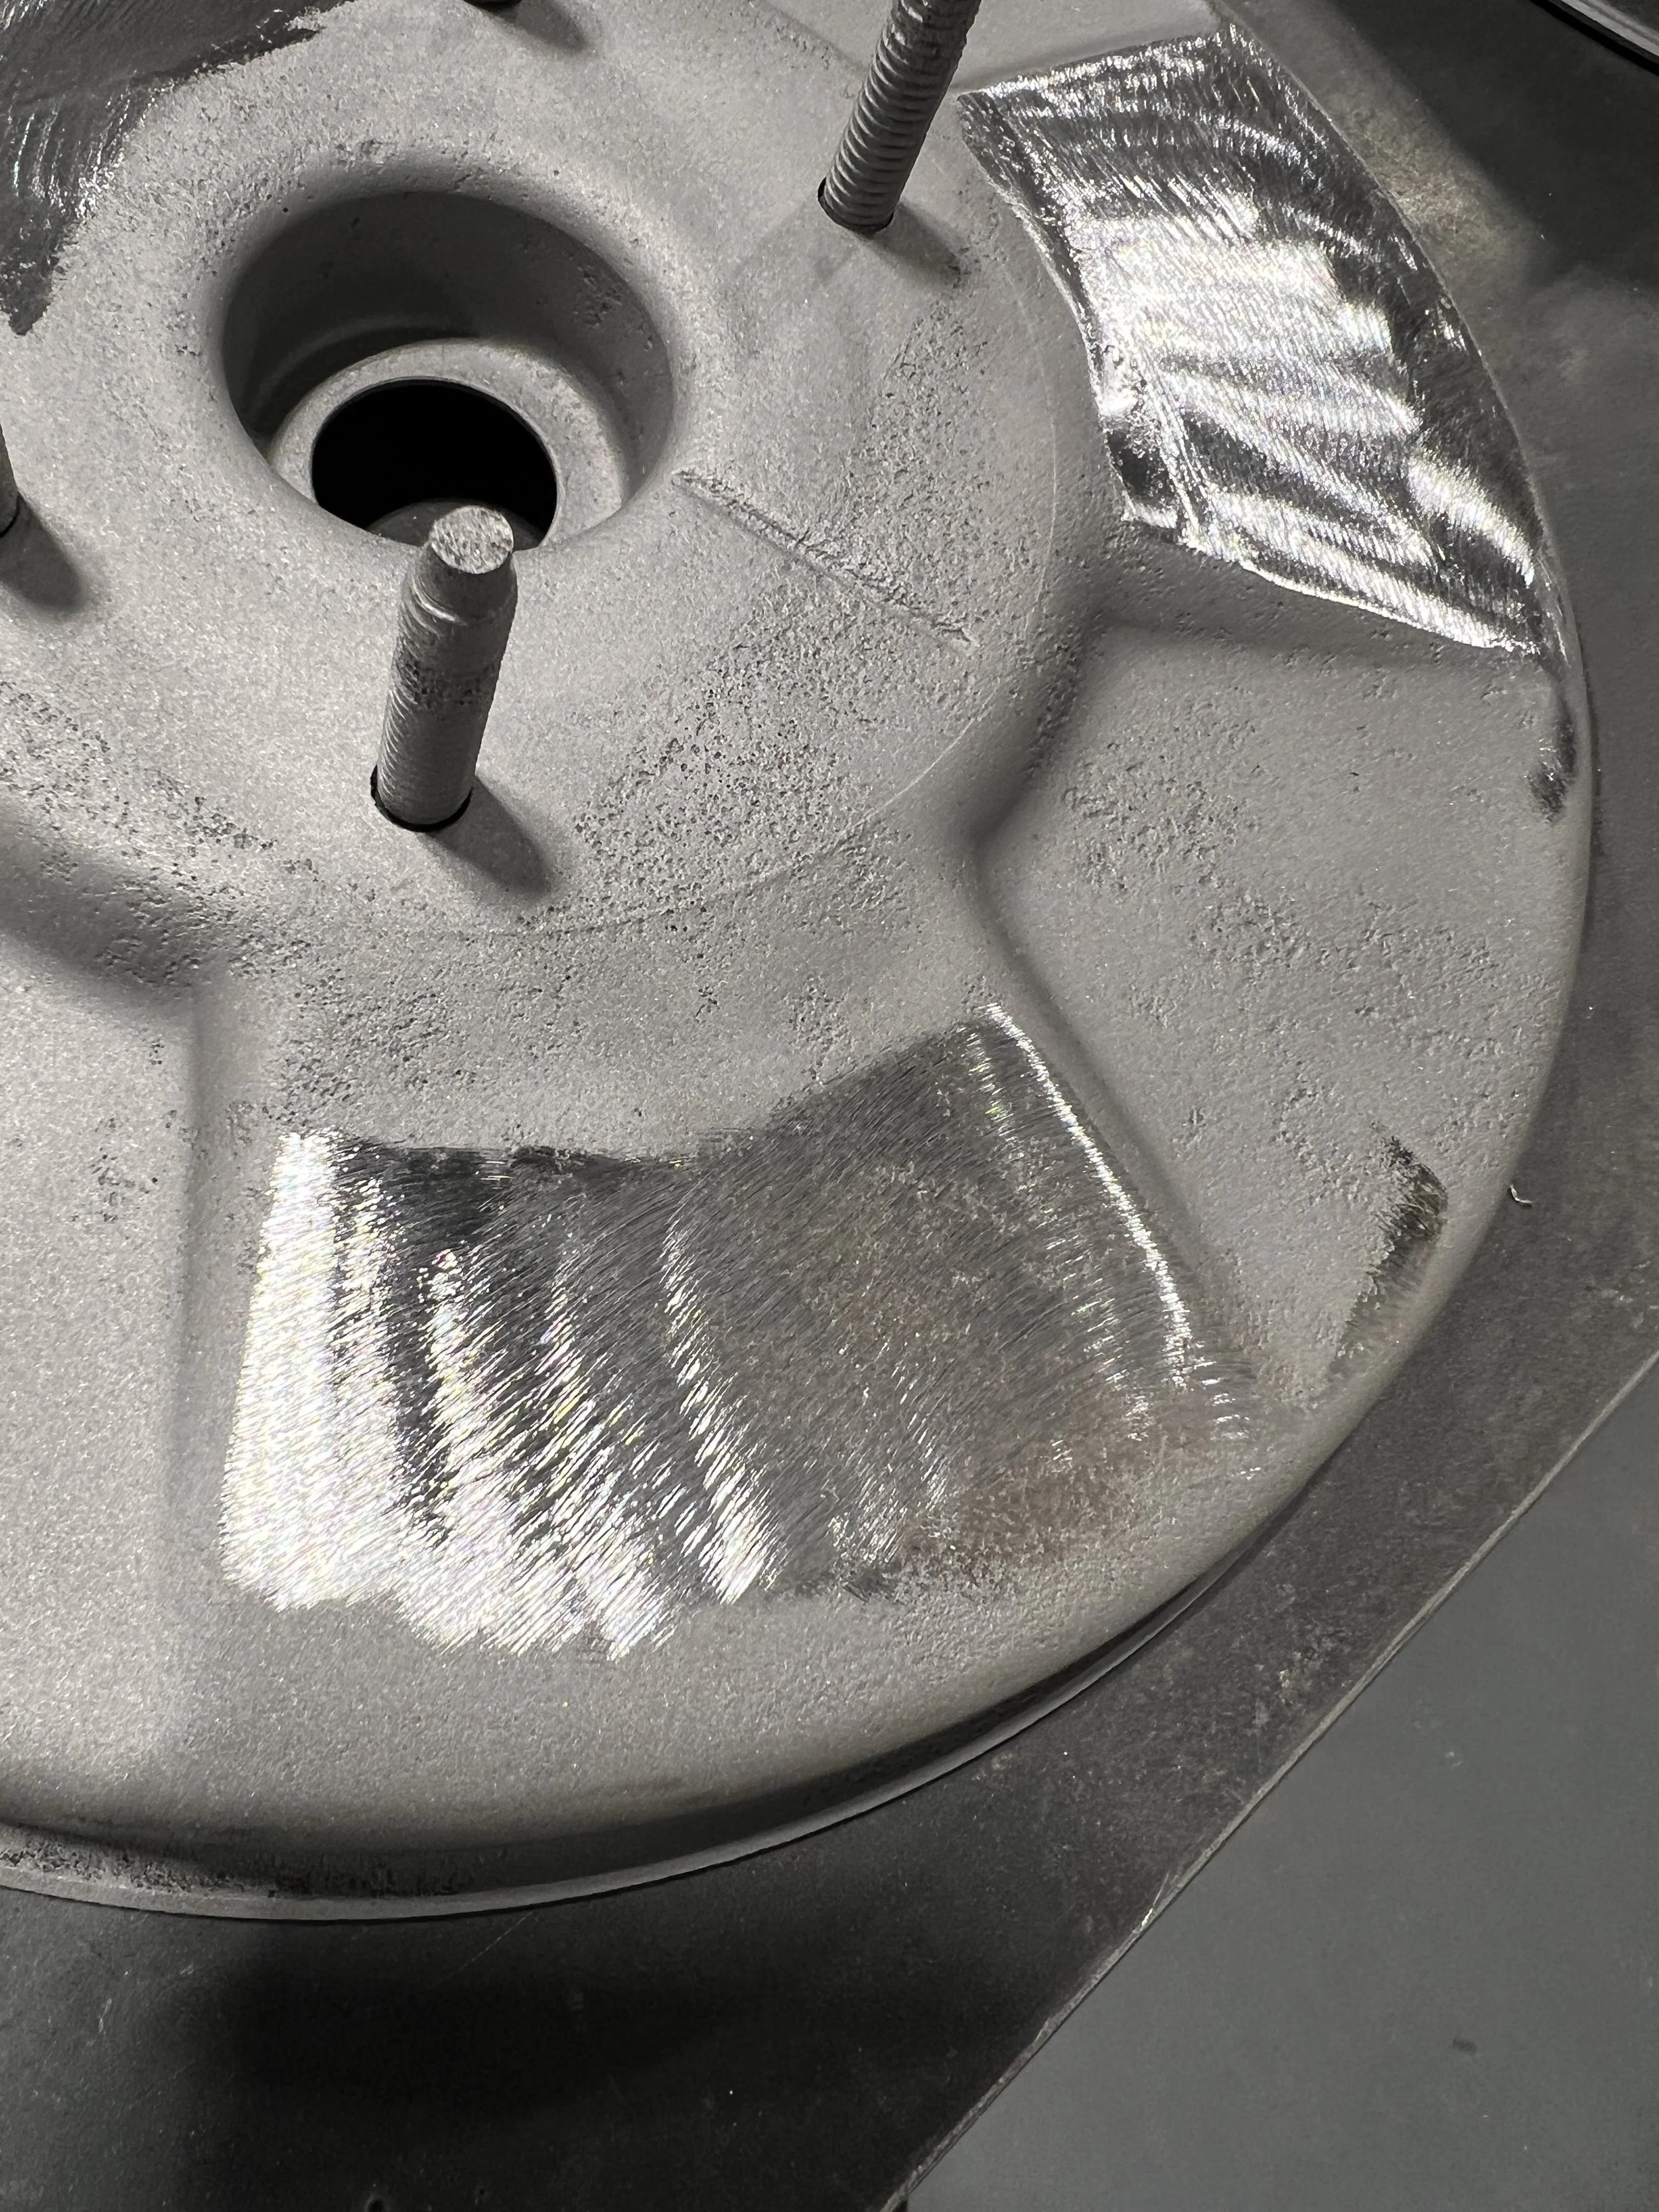
Once the core was disassembled, we then sand blasted the outer shell. Even what looked like minor rust left visible pitting. Yellow zinc plating will only look as good as the metal it’s applied to. The pitting was minor enough that with gentle work from Scotchbrite disks, some sanding and buffing with Scotchbrite pads, the shell was suitable for plating.
While some pits remain, they are in places that will be covered by other components. With some elbow grease, the shell now has a surface finish that is great for zinc plating.
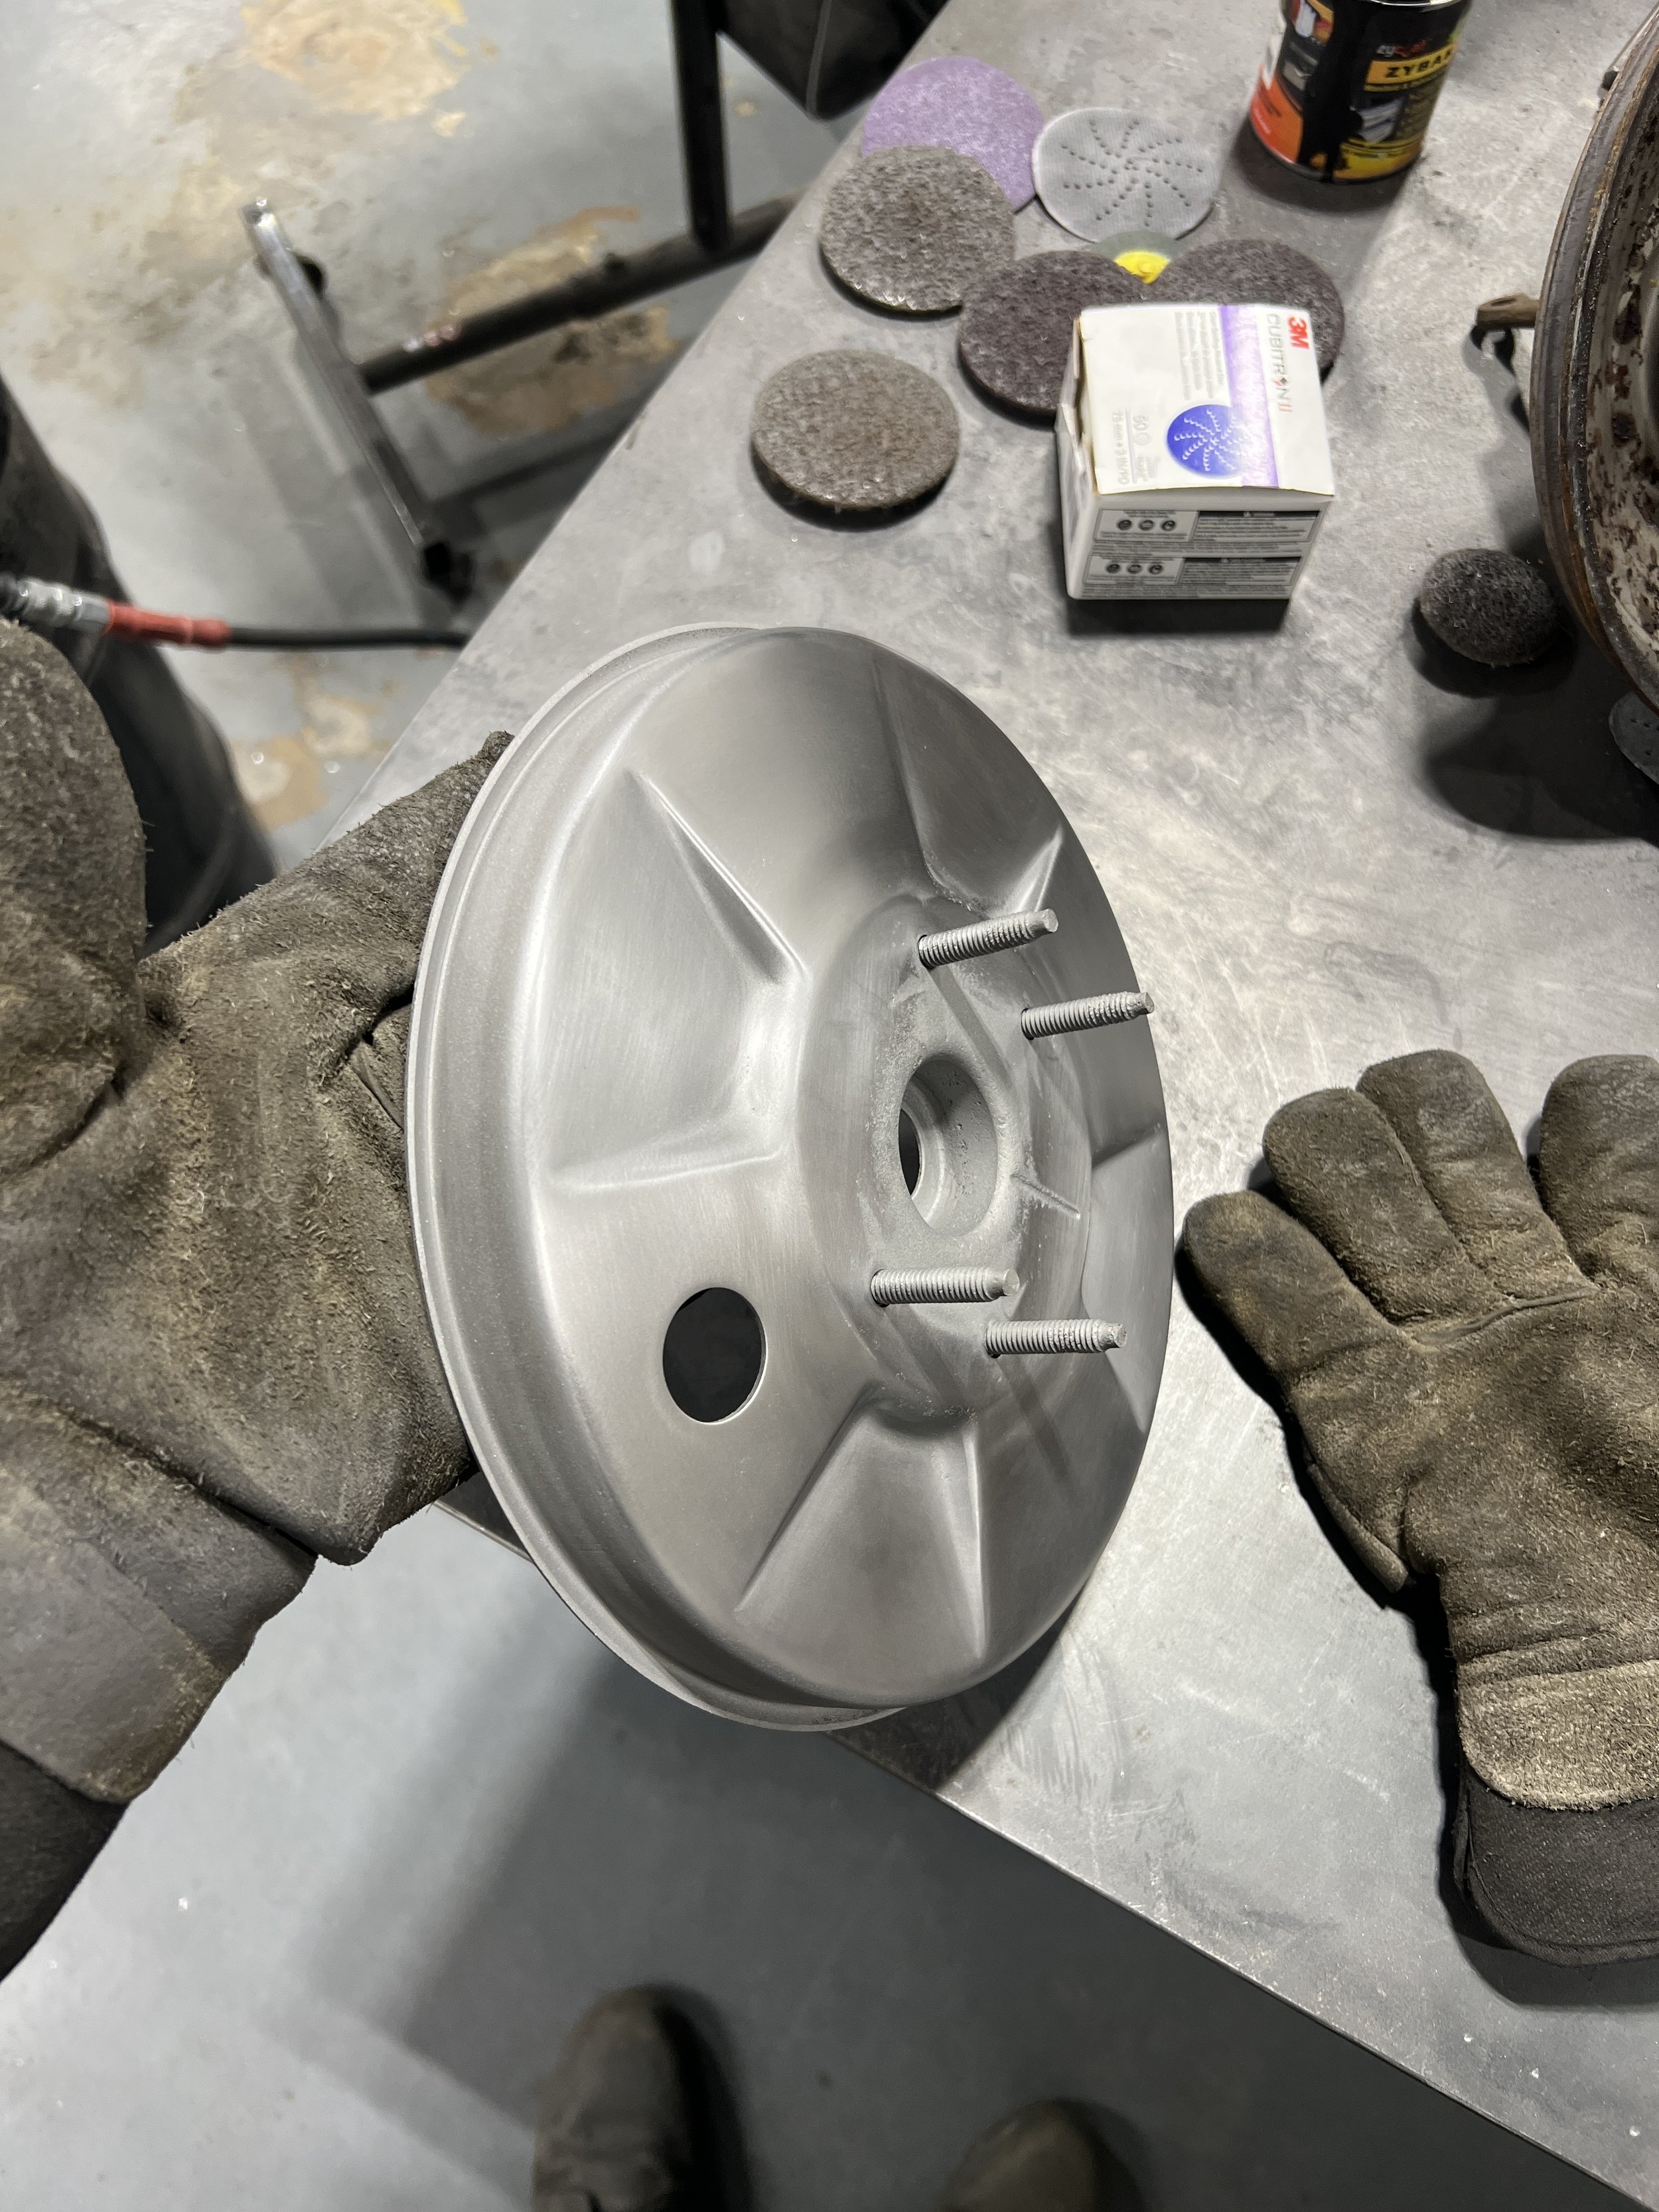
24 hours later and our freshly zinced parts were back in our hands thanks to James Baldwin of MotoBlast in Neptune, NJ. The plating was very reasonably priced and he took care of a few other components for the car.
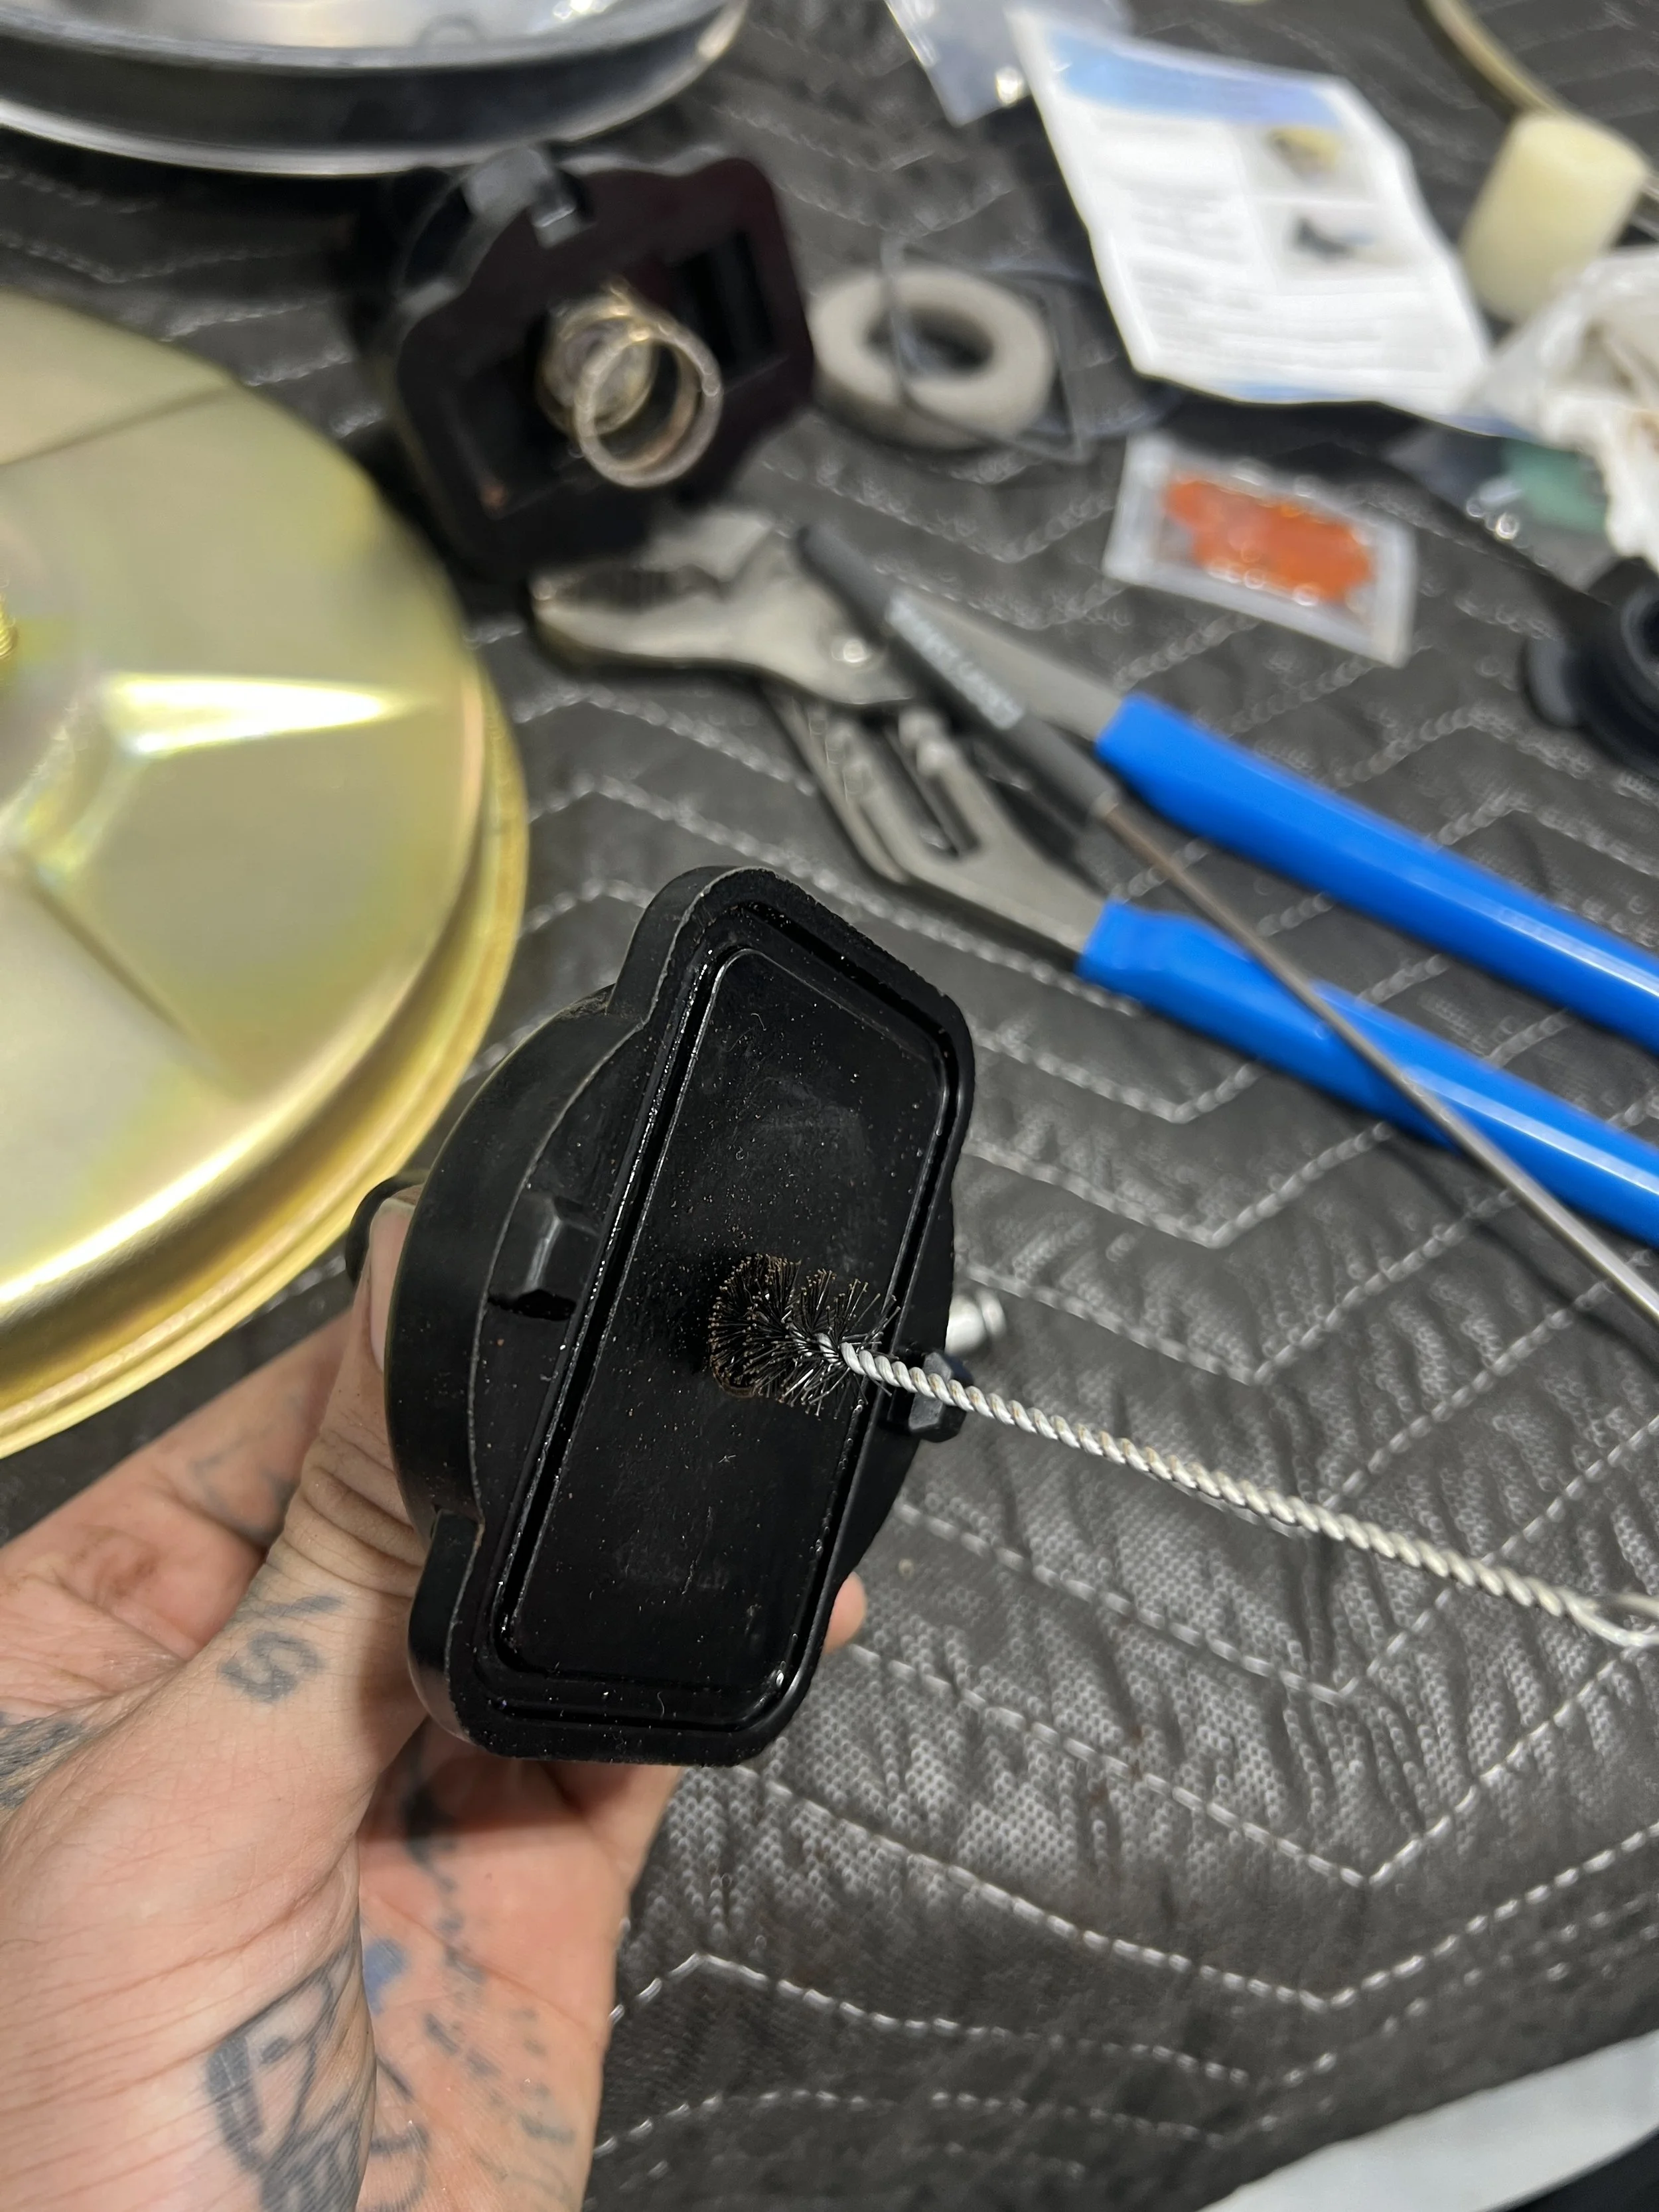
Every part to be re-used gets cleaned.
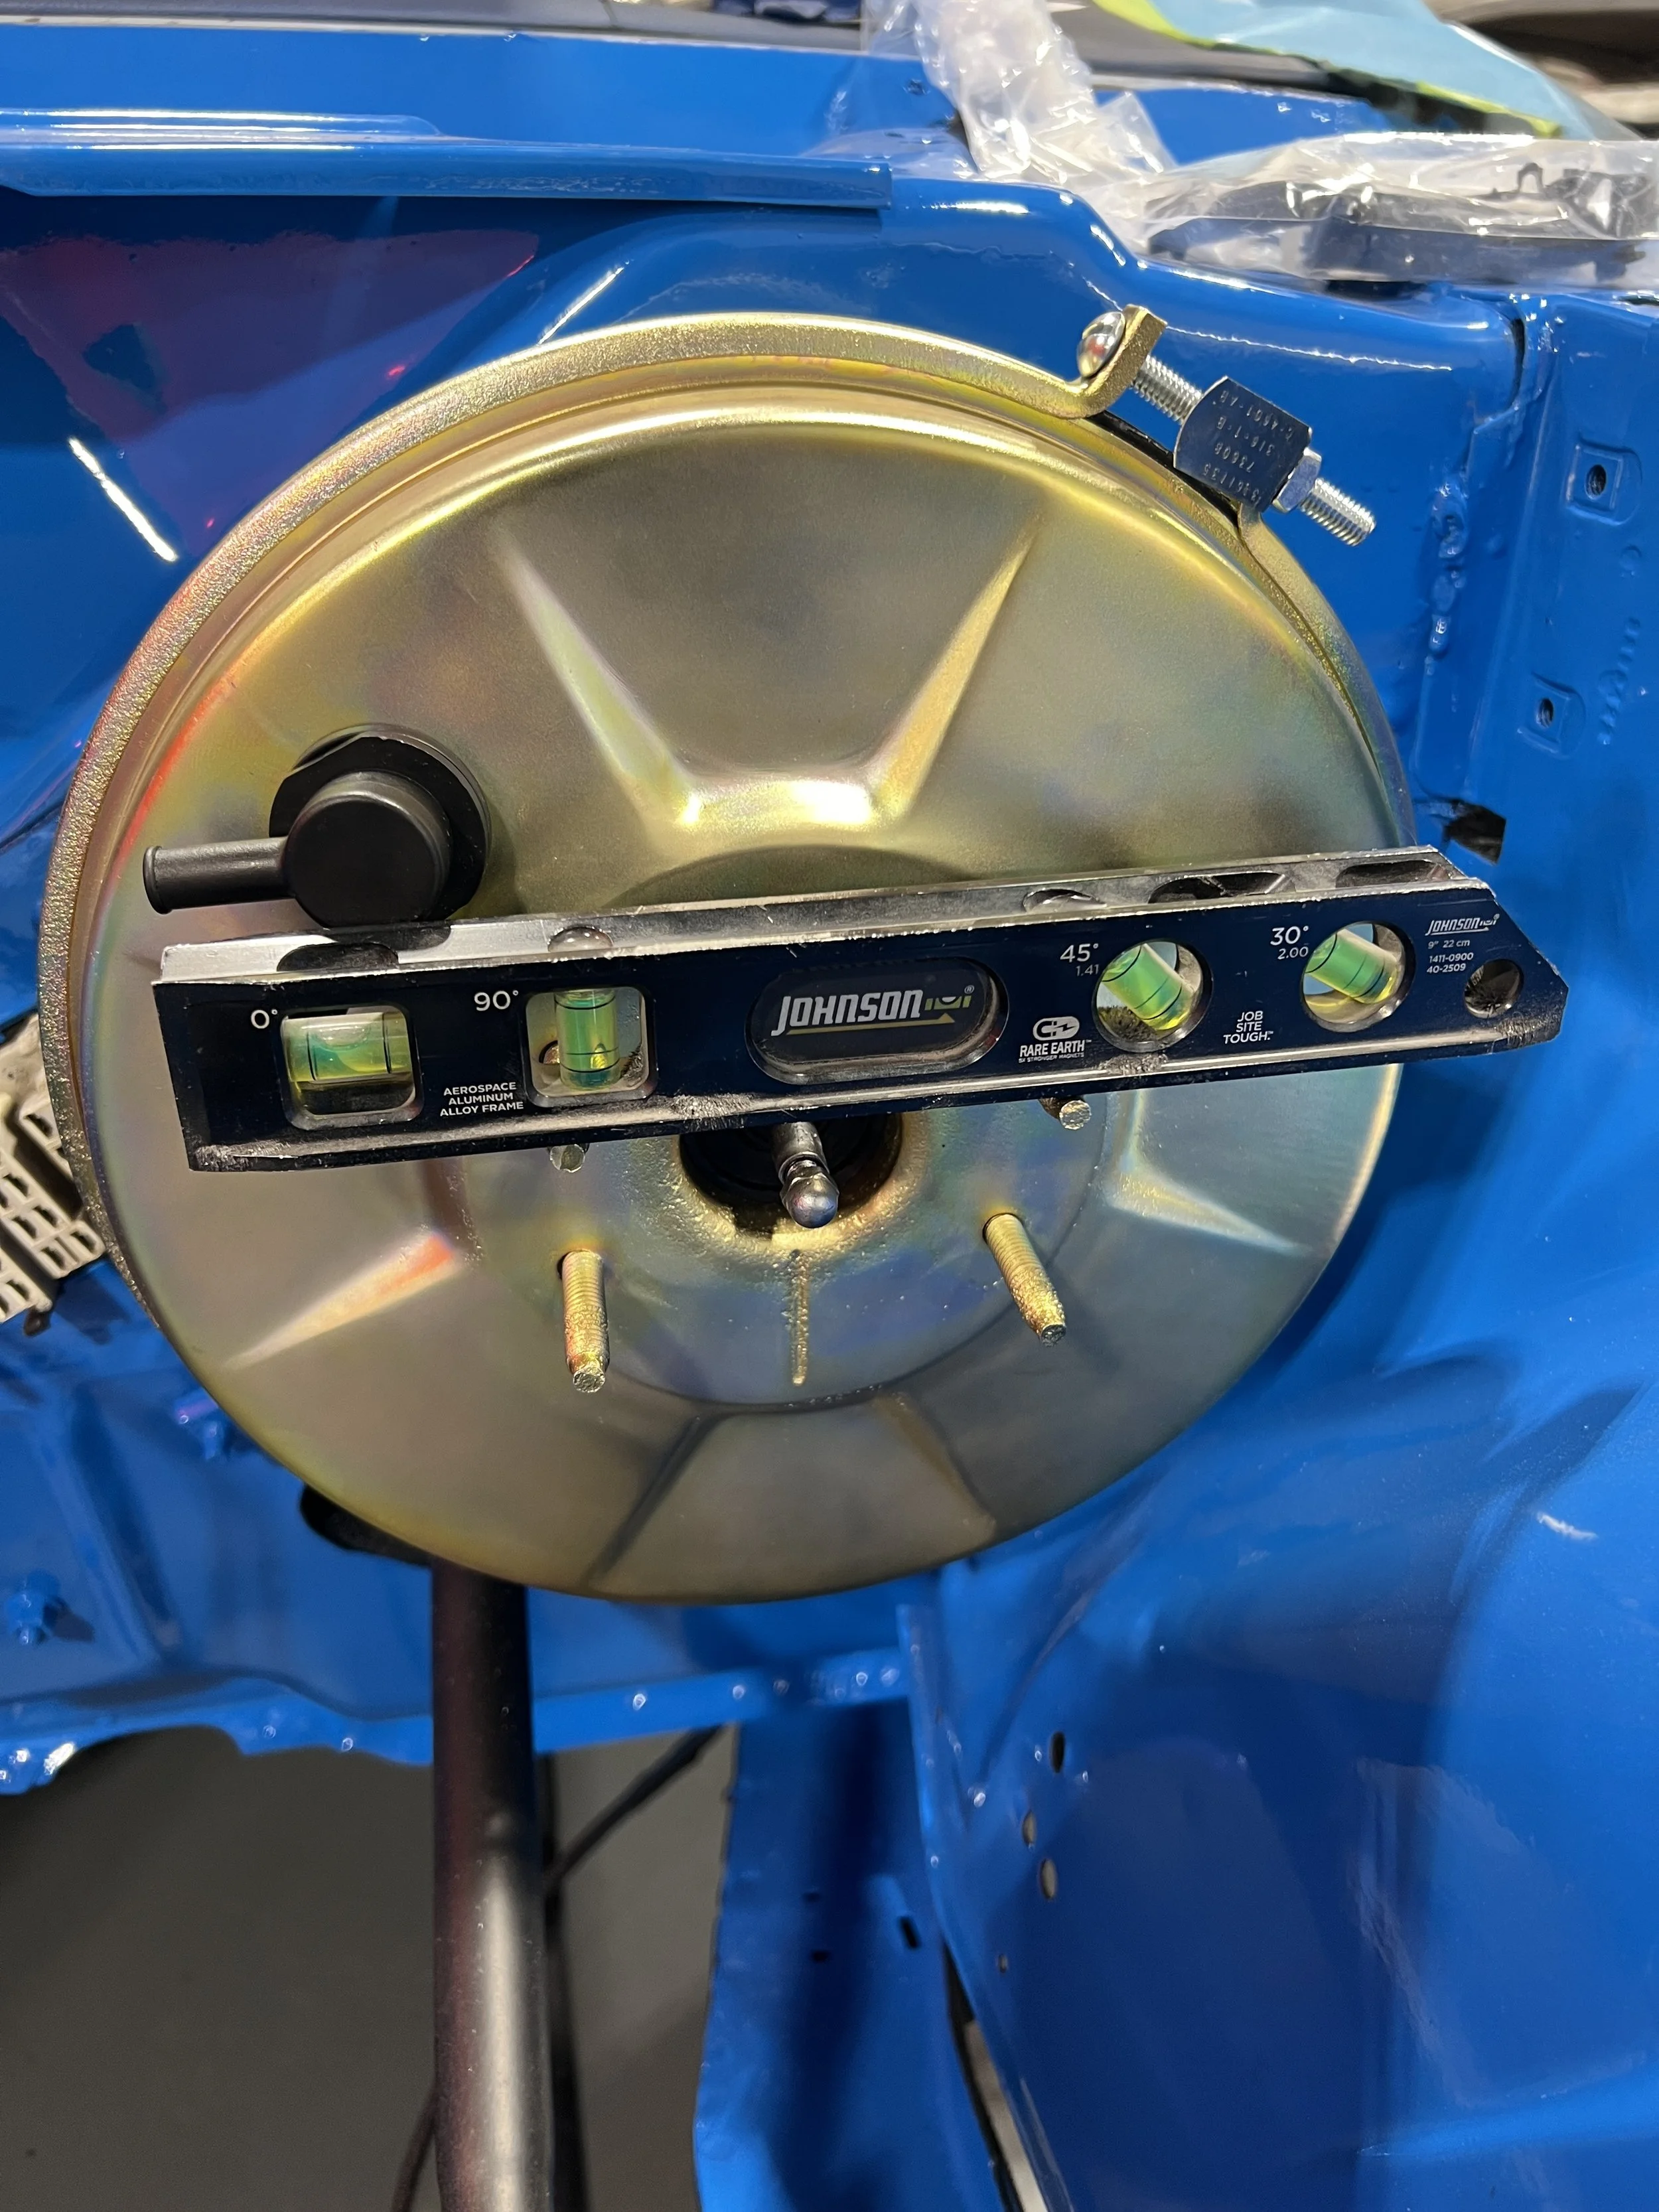
Before the band clamp can be tightened, the shell is checked to ensure it is indexed correctly so the master cylinder sits level.
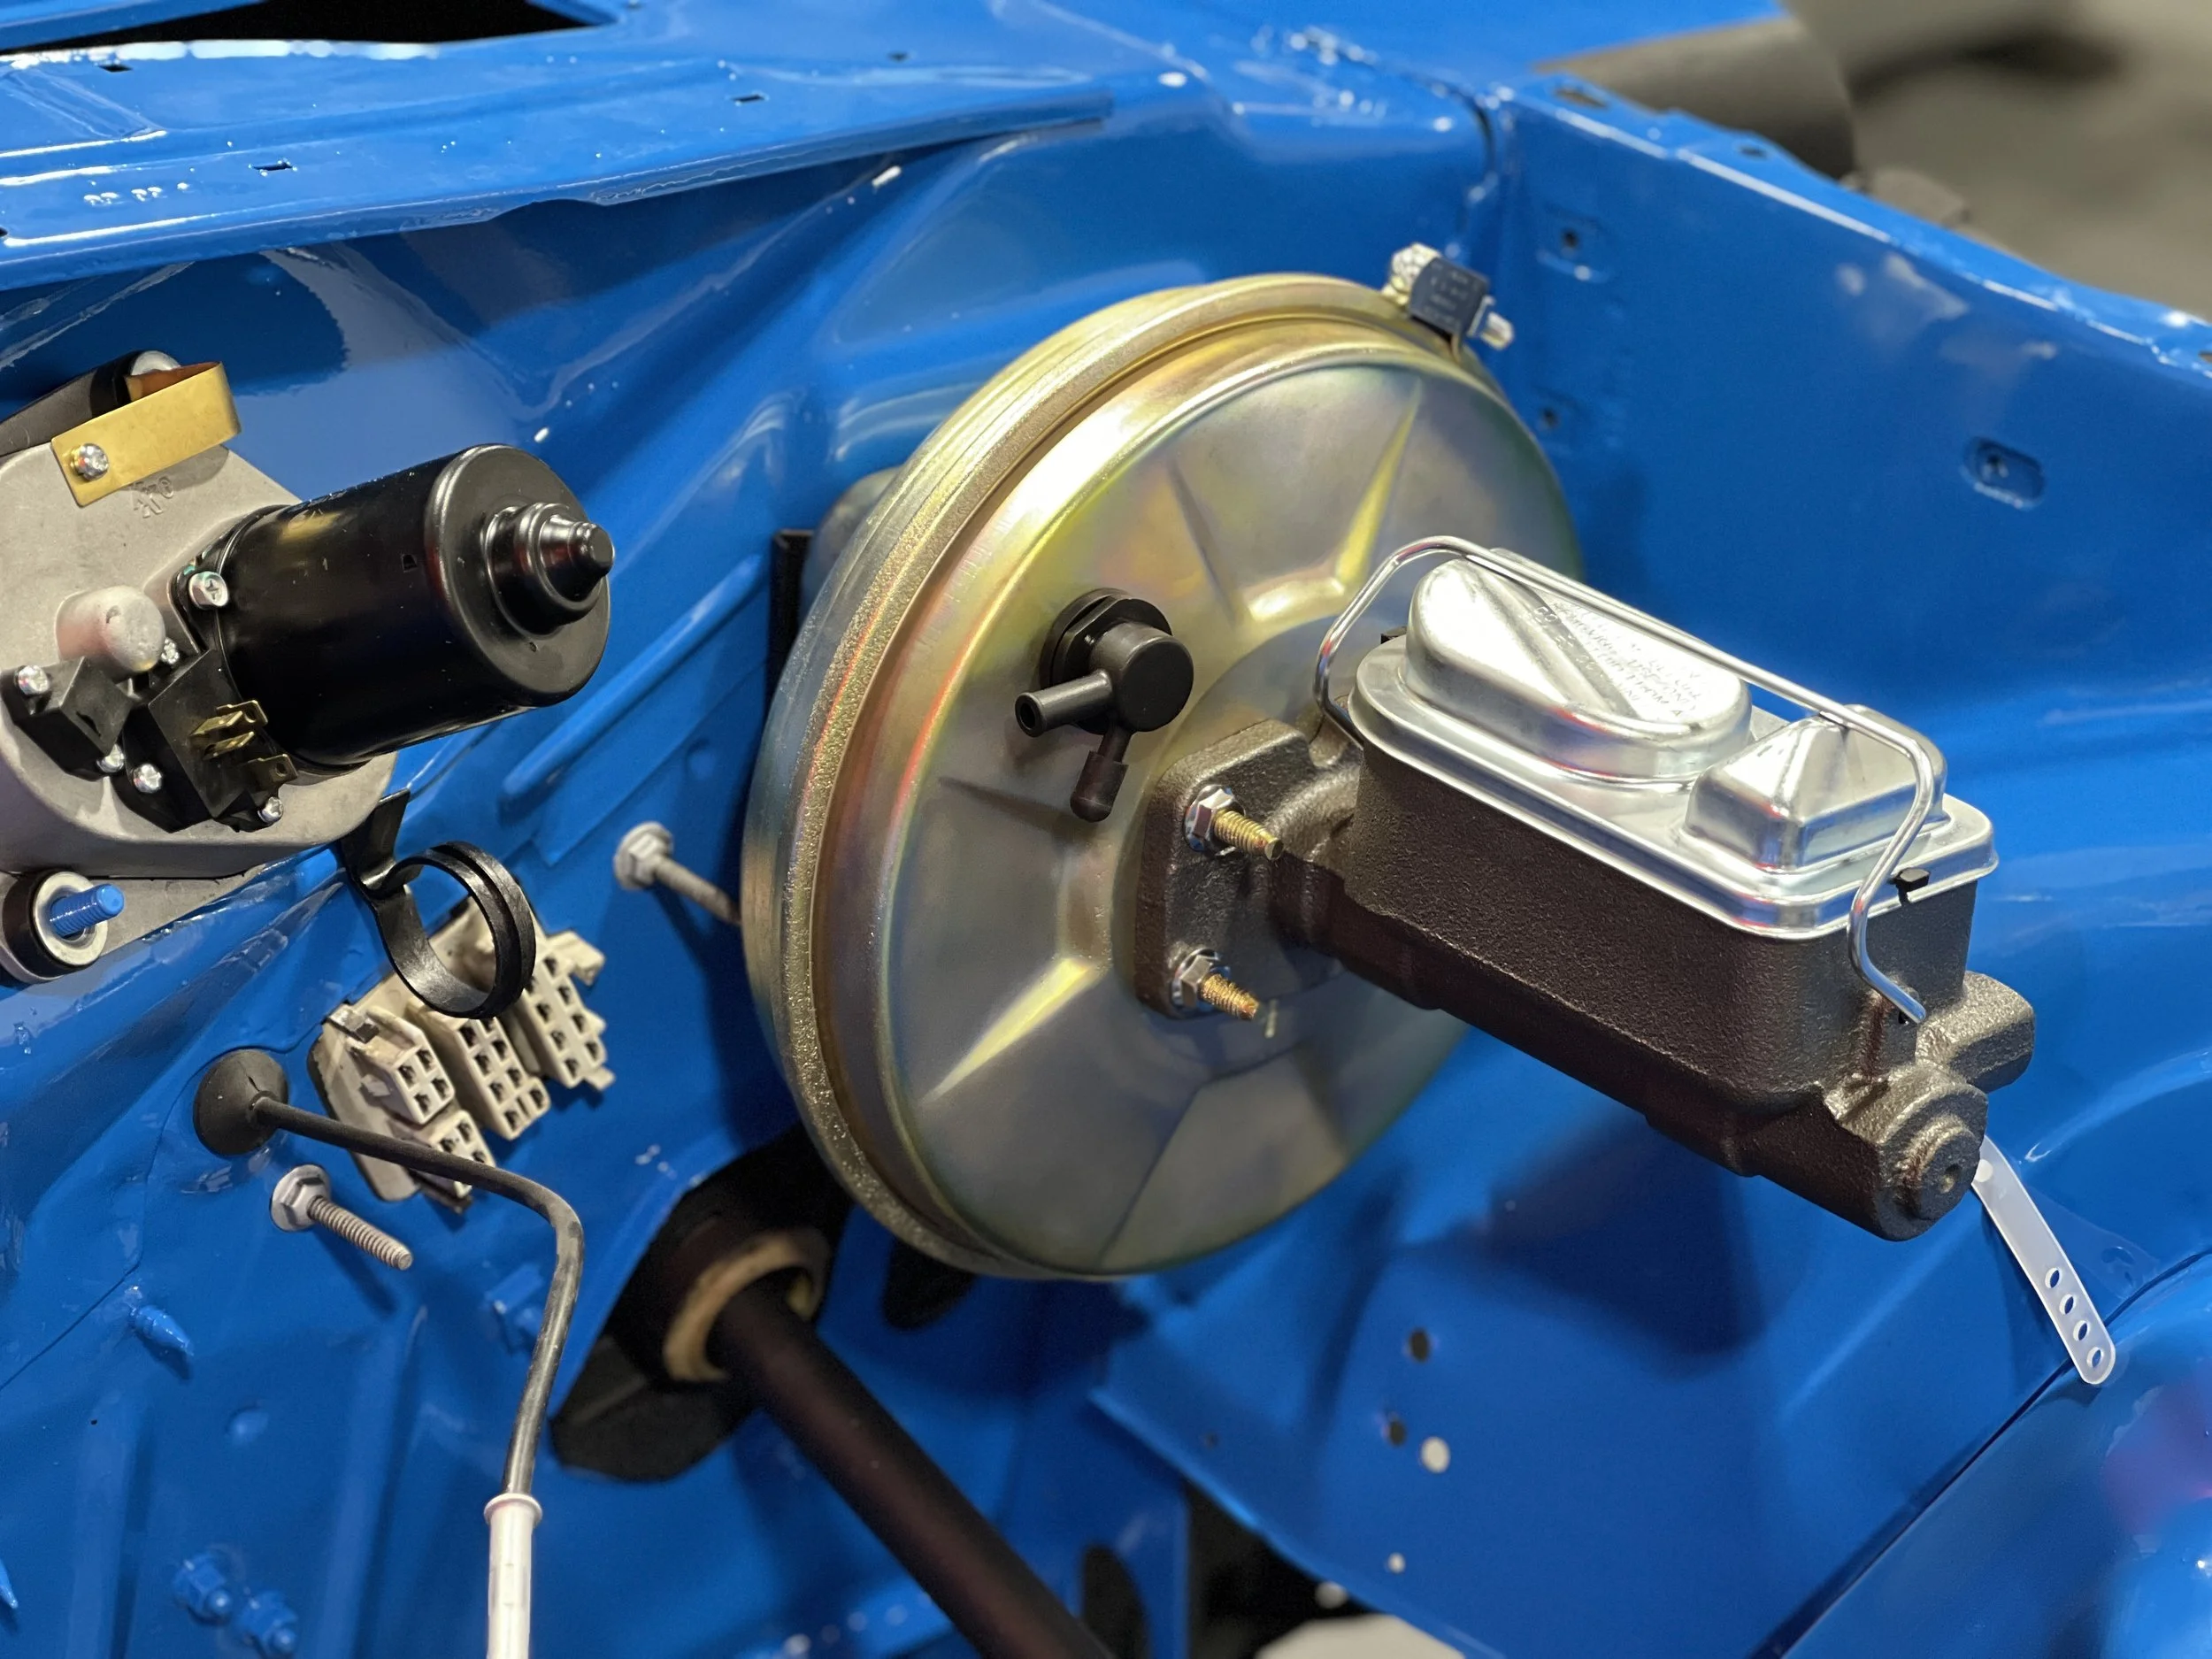
The details coming together. The fresh master cylinder coated with a cast iron paint to prevent rusting, a new wiper motor, new wire loom retainers, and lastly the rebuilt and restored booster. These are the details that take a car from “that’s nice.” to WOW! This car is clean enough to eat off of! Hey Tom, come over here and check this car out!”
